This piece I felt was worth a posting.....(I know I rarely post nowadays, by the way, this has been said way too many times, by way too many people, but I'm saying it again. Sorry. This job and twins keep me pretty busy. )
As well as loving and restoring MCM pieces, I love when Art Deco and MCM get together and create something...That being said, this is one fine example of that trend , Designed by
Gilbert Rhode (even though he is known as one of the founders of the Modernist movement) for Herman Miller in 1933. It seems he was very ahead of its time.
I am also restoring several other pieces from this same series (an Upright bar cabinet and tea cart), as well as a maple barrel chair designed by him. I will also post some pics of these as they are completed. For now, we'll focus on the credenza..
This one was not in very rough shape, but definitely in need of some restoration. I am giving a little glimpse here into the process (hopefully not to give everyone 'tired head'), just so you can see how extensive the refinishing process (especially with a two tone) is on some of these pieces.
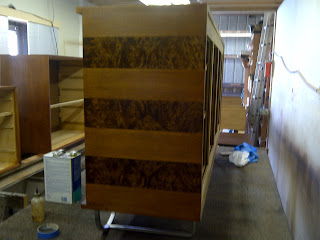
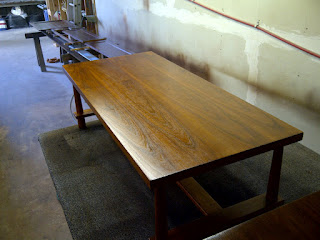
In the first picture we have it dis-assembled somewhat and ready to go on the stripping table, the second is stripped, sanded and just about completely prepped for the spray booth sans a few minor scratches and chips to be raised and filled...
And, once we finally get it into the paint booth, here are some of the pictures of the process for the two tone... I have to tape off one section to add the darker color (for the burl), then put a coat of clear
(I just say 'clear' because its more of a 'generic' term. I have spent many years developing this combination of finishes and I can't reveal it all here.)
so the color won't bleed through the tape when I reverse tape it to do the other color, then, reverse tape it (after I have sanded and refined the lines of any bleed), stain that
(this staining is a specific system also I have developed that doesn't mask the grain of the wood, but just adds enough color to bring it up to the natural aged color for that wood/finish) and blend it ,, let it dry and finish it out ...
(also, another long process...don't want to give everything away here)
I will say that, like Sam Maloof's finish (not the same but similar in many respects), I use a combination of an oil and lacquer for the clear coating which really brings out the beauty of the grain and breathes like a traditional furniture finish should, so it won't crack and peel, like a plasticized finish will. Anyway, here are a few pics....
taped off to stain burl
stained
Drawers Stained and oiled, both colors
Cabinet stained and oiled both colors
We normally dis-assemble cabinets somewhat to have more of a uniform finish (ie: handles, glass, doors, drawers out and sometimes the back removed if the inside is to be done) and this was definitely no exception, especially since it was being readied for a museum. (I am not privelaged to know which museum yet, unfortunately, but excited about the prospect, nonetheless)
Here are some pictures of the inside...The drawers and doors were done inside and out as well as all of the accessory drawers. I love the way the drawer slides encompass the whole height of the drawer and instead of just one top drawer with a couple of trays, you also get a whole bank of drawers to house different utensils. Very cool.
Cabinet finished and re-assembled without handles
And finally, the finishing touch. Here is is all assembled with the handles and the base all cleaned up and mounted.


.jpg)


